Start with your own blogging site with Ghost CMS & AWS - part 1


This is a step-by-step guideline that I followed when I deployed my blogging site. For your information, I am using macOS.
There are many options where you can start your blogging site with Ghost CMS. Initially, I looked into the following options:
- Ghost Pro
- Digital Ocean + Ghost CMS Installation
- GCP (Google Cloud Platform) + Ghost CMS Installation
- AWS + Ghost CMS Installation
Obviously, starting with Ghost Pro is easiest and quickest way to launch your site. However, I decided going with AWS option. The main reason is simply because I am more familiar with AWS platform. Moreover, leveraging free-tier gives me flexibilities of experimenting this platform and a chance to save money initially. (Just FYI, GCP also provide $300 in free credit for new customer and free-tier as well).
Before you proceed, please make sure that
- Domain is purchased and ready to use (I will use Godaddy for this guildeline)
- AWS account creation is already completed
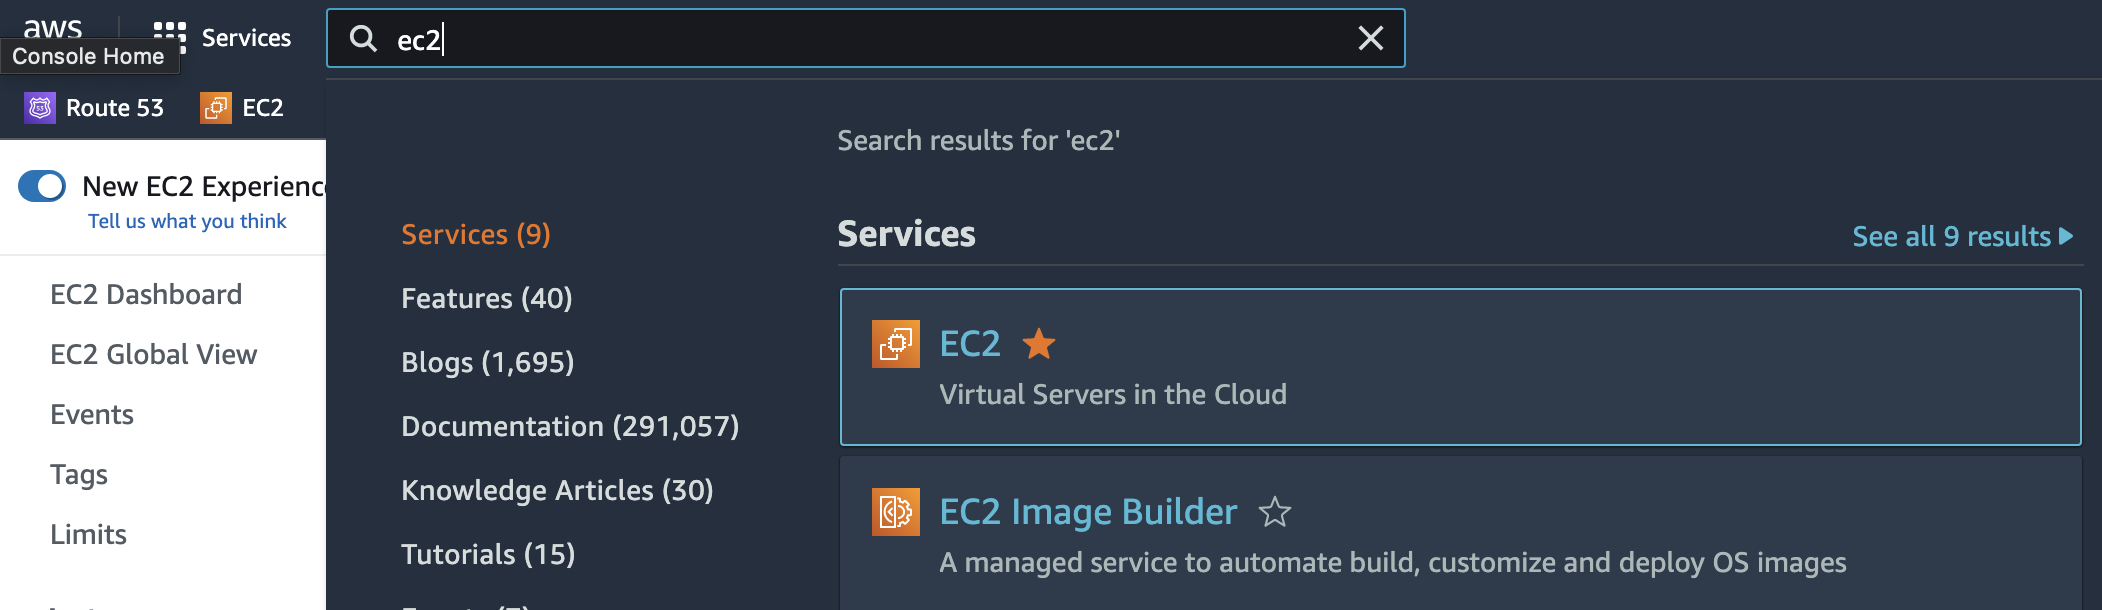
- Finding EC2
Once you log into AWS console successfully, type ec2 in the search bar and click the "EC2" in the Services section of result panel.
In either Instances page or Dashboard page, find the orange button called "Launch Instance" and click it.
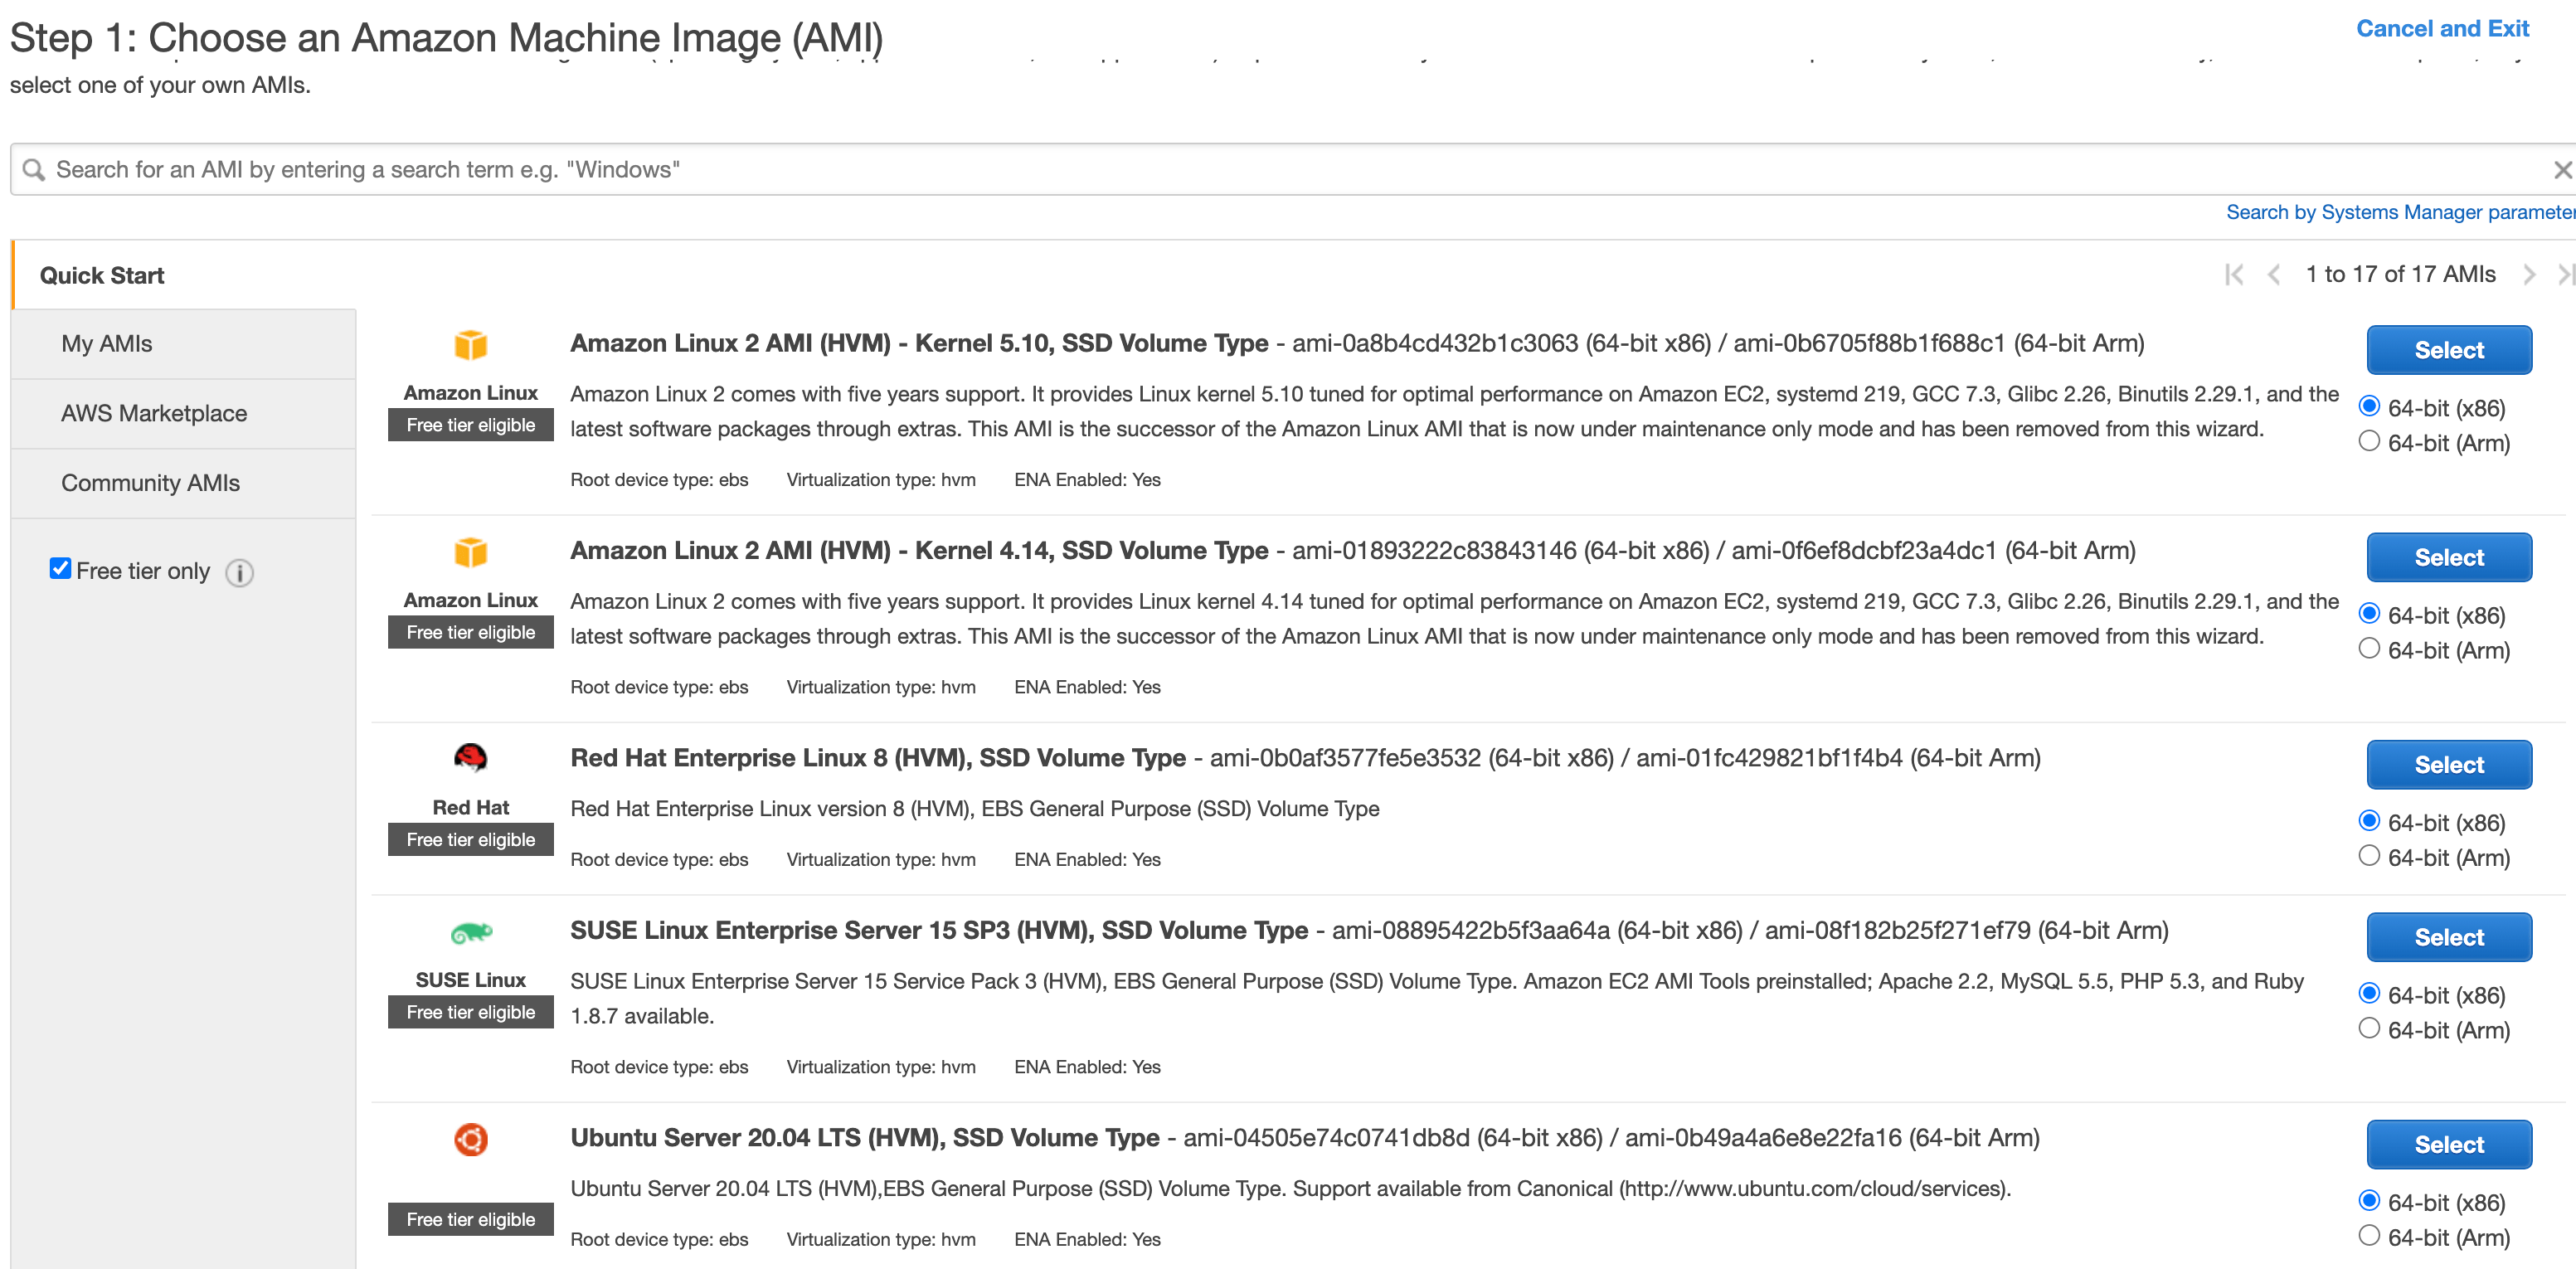
2. Choose an AMI (Amazon Machine Image)
Find Ubuntu Server 20.04 LTS (You can choose 18.04 LTS if you want) and click "Select" button. If you are having a trouble with finding it, you can click the checkbox "Free tier only" to filter the AMI list to show only eligible free tier.
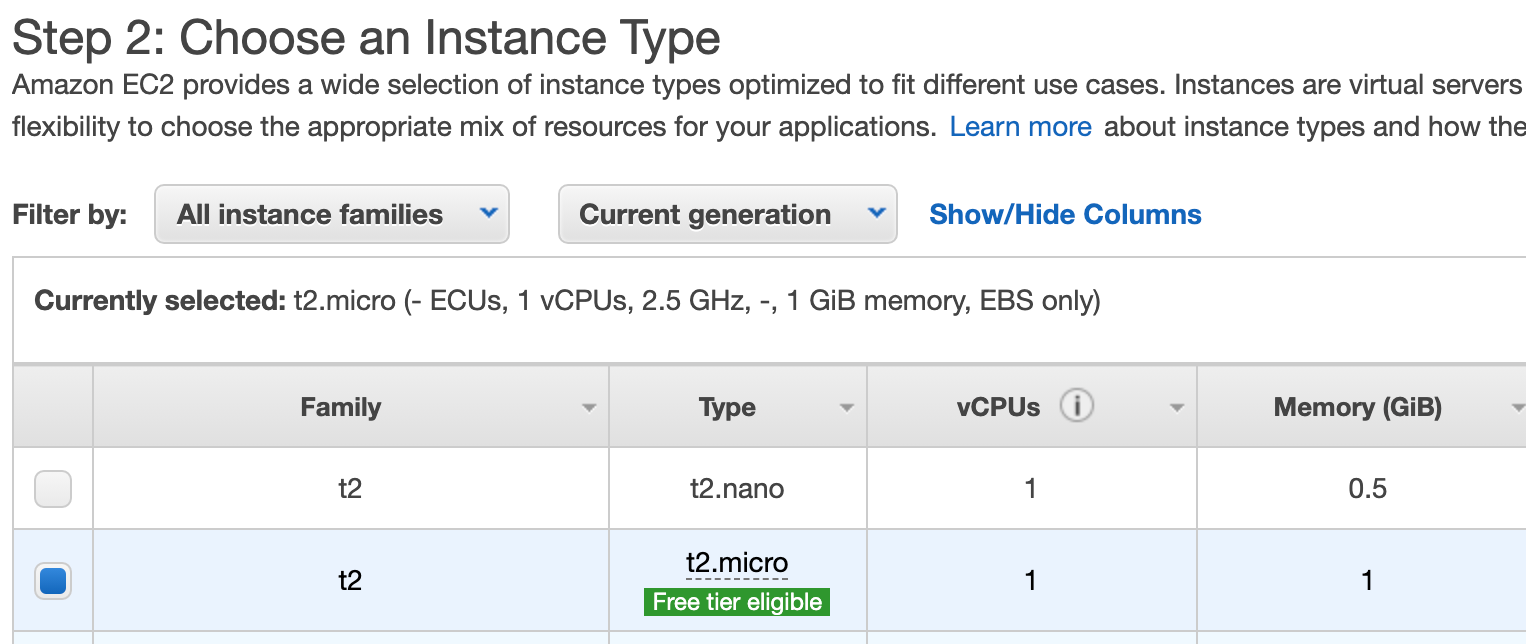
3. Choose an Instance Type
t2.micro should already be pre-selected. Please make sure you can see "Free tier eligible" with green highlighted box. Click "Next:Configure Instance Details" button.
4. Configure Instance Details.
Nothing needs to change in this page. Click "Next: Add Storage" button.
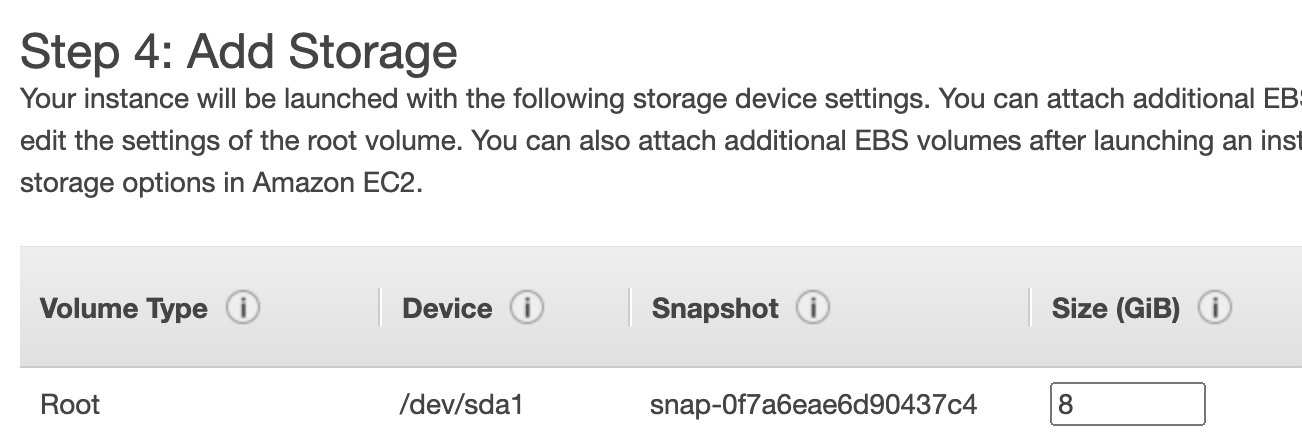
5. Add Storage
Free tier can cover up to 30 GB, so you can leave the size as default (8 GB) or upgrade the size up to 30. In my case, I didn't change the size. Click "Next: Add Tags" button.
6. Add Tags
No need to add Tag. Click "Next: Configure Security Group"
7. Configure Security Group
SSH rule should exist in the list. Check "Source" column and change the dropdown list from "Custom" to "My IP". AWS automatically detects your IP address and fills out the textbox with your IP. This basically whitelist your IP address so that you can ssh into this ec2-instance with your pem key file later.
Click "Add Rule" button to add HTTP and HTTPS.
For HTTP,
- Type: HTTP
- Port: 80
- Source: Anywhere
For HTTPS,
- Type:HTTPS
- Port: 443
- Source: Anywhere
This eventually makes HTTP and HTTPS publicly accessible.

Click "Review and Launch" button.
8. Review Instance Launch
Review the detail information of your instance once more time and click "Launch" button.
Note: Under security group, there should be total 5 protocols which are 1 ssh, 2 HTTP and 2 HTTPS.
9. Key Pair setup
There are two options:
- Using an existing key pair: Choose this option if you already created the key pair before and want to use it to ssh into this newly created ec2-instance.
- Creating a new key pair: Choose this option to create brand new key pair. Select "RSA" and provide key pair name and click download.
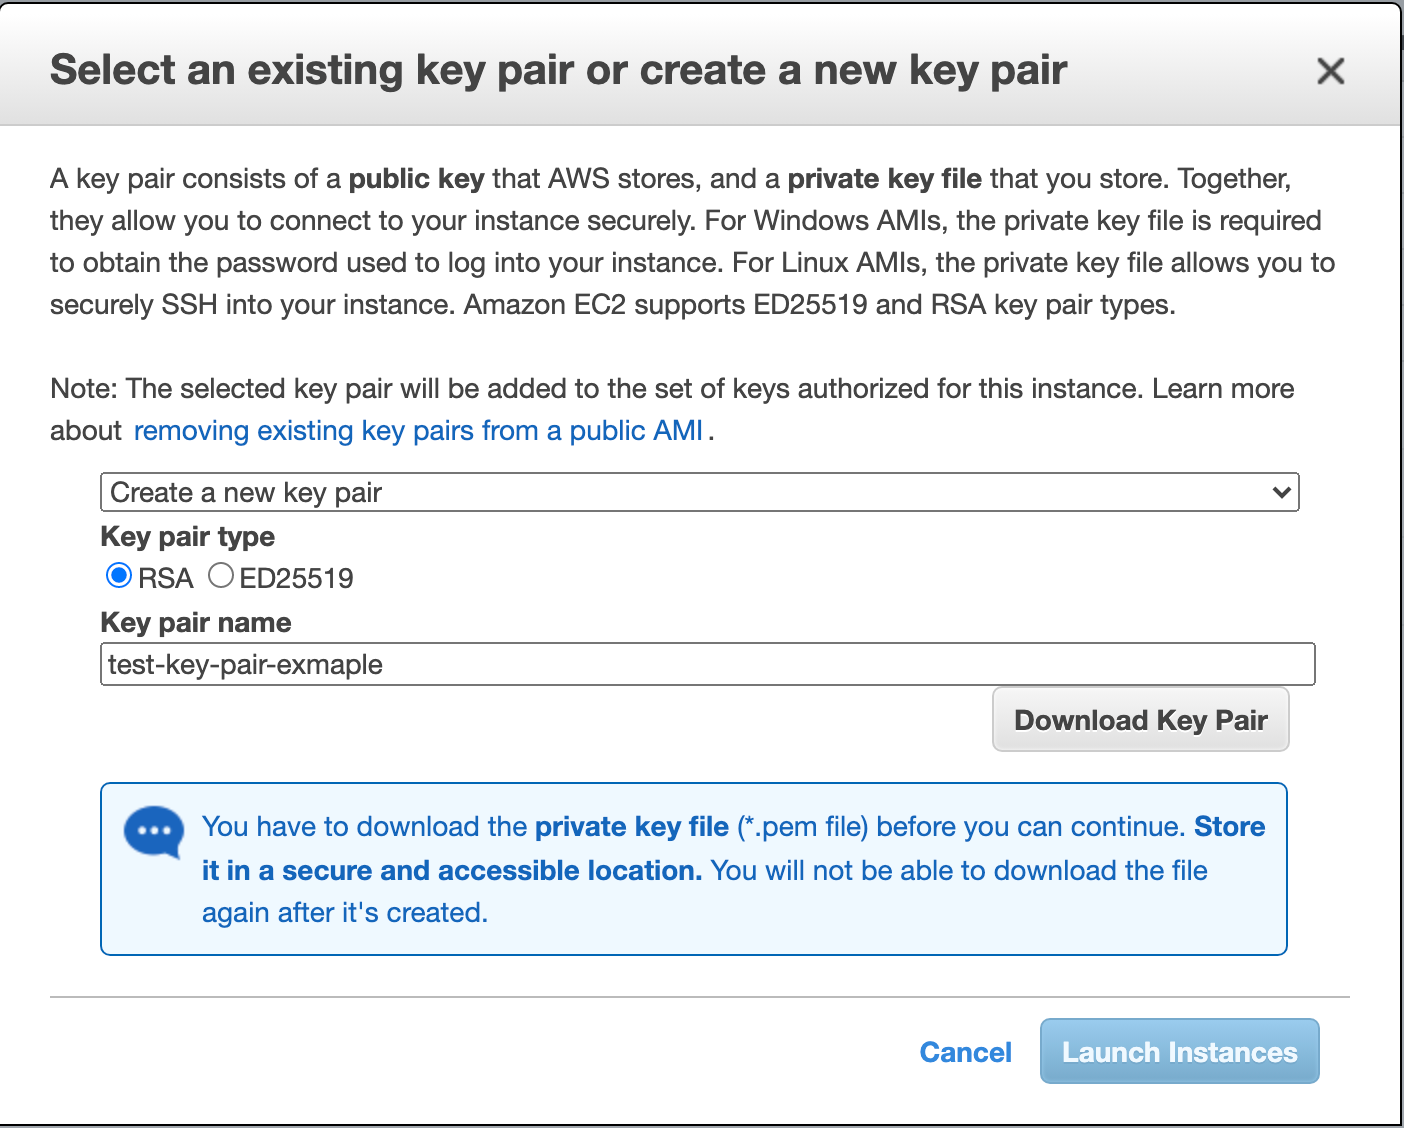
Once you download the key, the "Launch Instance" button should be enabled. Click the button. Launch Status screen will be appeared. Click view instances button.
10. Verify and confirm the instance
The new instance should be on the instance list without having any name. You can add the name by moving your mouse over on the empty name column and click the edit icon. Provide the name and save it.
Next, check Instance state column and Status check column. They should have "Running" and "2/2 checks passed" values respectively.

Awesome! Now your ec2-instance is ready to install Ghost CMS.
In Part2, I will cover the following topics:
- SSH into ec2-instance from your local
- Install nginx, node and mysql
- Install & configure Ghost CMS
- Set up the Domain for the site
- Update nginx configurations
Thanks for reading this post!