Create a NER endpoint by using AWS API Gateway, Lambda and Comprehend

In this post, I will create a NER service endpoint by leveraging AWS API gateway, lambda and Amazon Comprehend. The post covers the followings:
- What is NER?
- Amazon Comprehend
- Create a Lambda function to handle a comprehend request and create a response with comprehend entities result
- Create an API endpoint that leverage your lambda function
- Almost done. Fix the possible permission issue!
- Test your NER endpoint call vis postman
For your information, this post does NOT cover API documentation and any topic regarding authorizing an API service endpoint.
What is NER?
NER stands for Named Entity Recognition. It is a Natural Language Processing (NLP) method to identify entities in a text. Entities can be varied such as person, organization, location, etc.
For example of the following text,
Steve Jobs was born in San Francisco, California. He was the co-founder, chairman, and CEO of Apple. With Steve Wonzniak, he founded Apple Inc. in 1976. He was also the chairman of Pixar. With NER process, these entities below can be found.
Person: Steven Jobs, Steve Wonzniak
Organization: Apple Inc, Pixar
Location: San Francisco, California
Amazon Comprehend
Amazon Comprehend is a NLP service that leverages Machine Learning to process a text and extract valuable insights such as key phrases, entities, language detection, etc. Among these features, entity recognition provide us what we need to achieve from our NER service endpoint.
So the process of our NER service endpoint will follow the steps below.
- The end user makes our NER post call
- API Gateway triggers Lamda function
- Lambda function initiates the Amazon comprehend request and massage the response data from Amazon comprehend in the format of what we need (In this post, we will return the lists of Person, Location and Organization and each item in the list contains text and probability)
- Response data is passed back to API Gateway
- Return the response to the end user
Create a Lambda function to handle a comprehend request and create a response with comprehend entities result
To create a lambda function, first go to AWS Lambda dashboard by searching lambda in the AWS console. In the dashboard, click Create Function button on the right top corner of the screen.
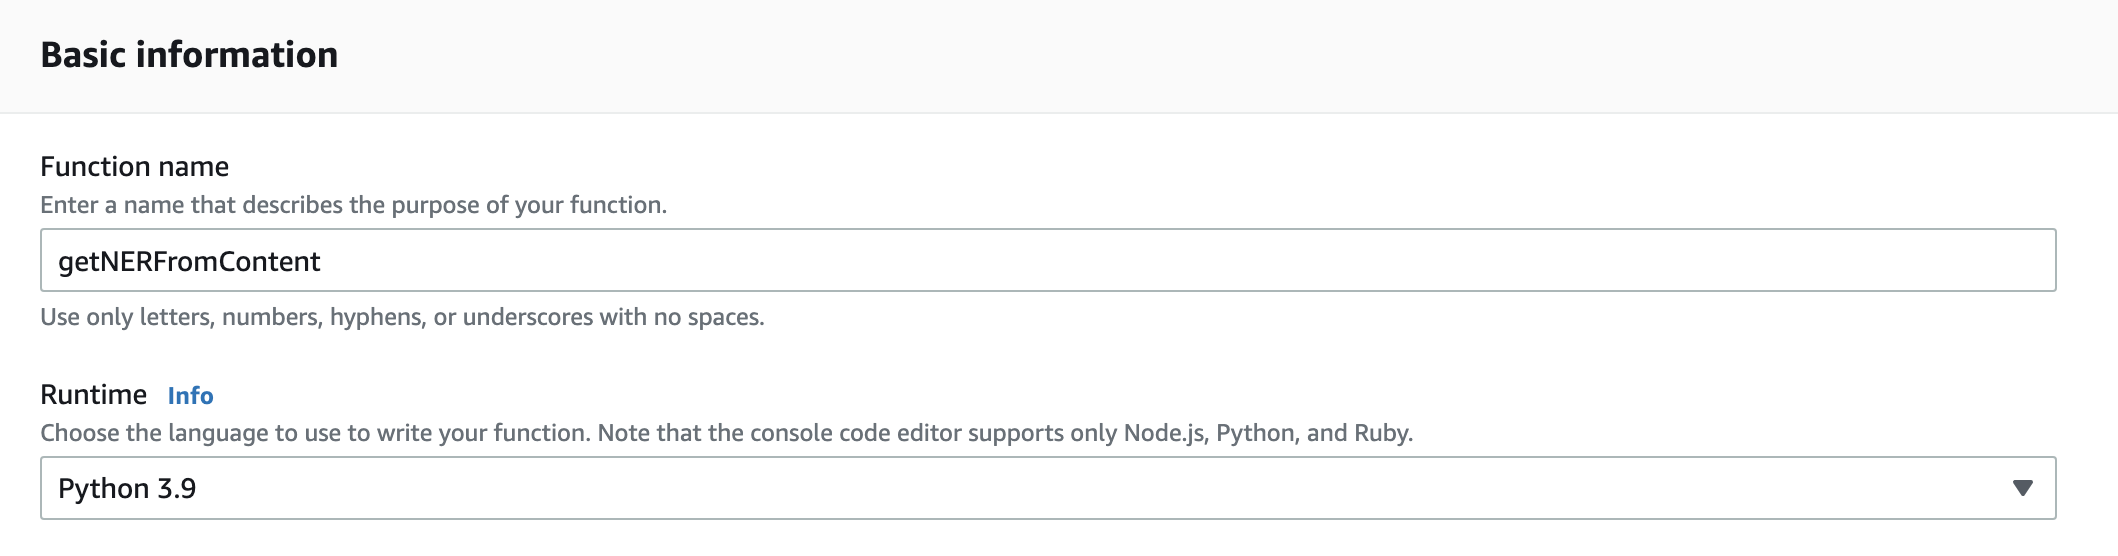
Provide a function name. In this post, I used getNERFromContent as a function name. Next, choose the Runtime as Python version 3.x. I chose the latest support version of Python at the time of writing this post which was 3.9. You can leave other options as they are. Click Create Function button again.
In the getNERFromContent detail page, the code source page will be automatically selected and the following source code should be there.
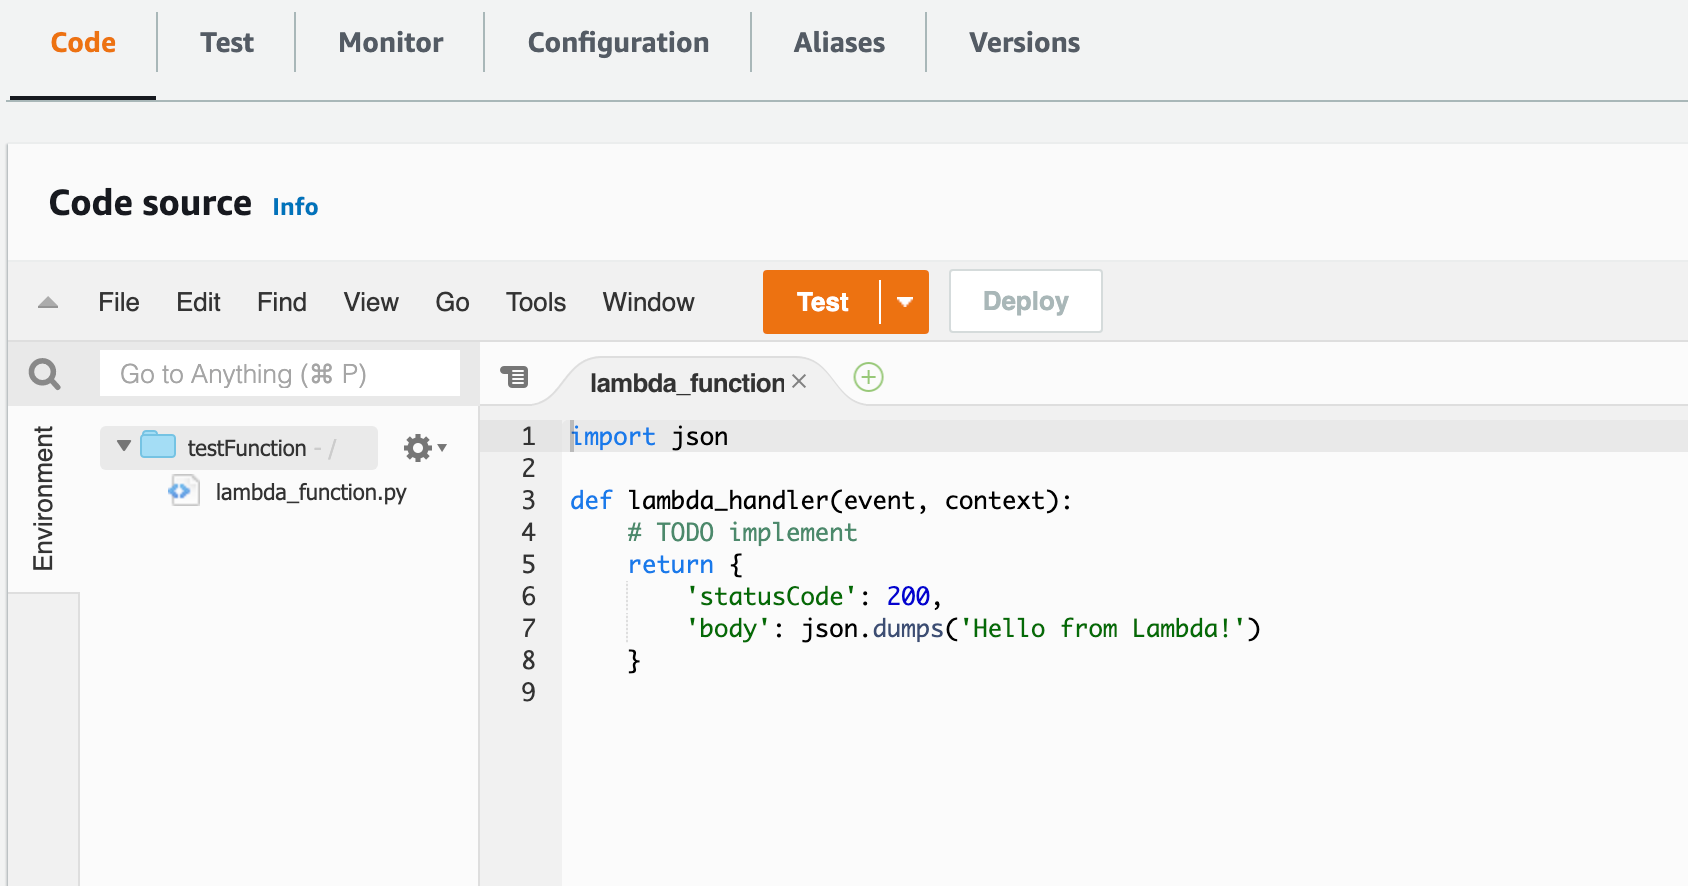
Remove the source code and paste the source code below.
Be careful! Indentation is very important in Python. When you paste the code, indentation might be misplaced. Please double-check.
import json
import boto3

#NER TAG Class
class NerTag:
    def __init__(self, text, prob):
        self.text = text
        self.prob = prob

#NER Response Class
class NERResponse:

    def __init__(self, error, success):
        self.error = error
        self.success = success
        self.people = []
        self.organization =[]
        self.location = []

    def add_people(self, nerTag):
        self.people.append(nerTag)

    def add_organization(self, nerTag):
        self.organization.append(nerTag)

    def add_location(self, nerTag):
        self.location.append(nerTag)

    def toJSON(self):
        return json.dumps(self, default=lambda o: o.__dict__,
            sort_keys=True, indent=4)


def lambda_handler(event, context):
    '''
    This handler will be triggered by API Gateway and create Amazon Comprehend request by
    using detect_entites function. The function will return a NERResponse that contains either lists of Person, Location and Organization NER tag
    or error message if there is an exception.
    '''
    try:
        #Get Content from Request body
        data = event["body"]
        body = json.loads(data)
        content = body["content"]
        #Get Language code that is passed as a path parameter
        params = event["pathParameters"]
        lang = params["lang"]

        #TODO:Language validation
        #Valid value should be en | es | fr | de | it | pt | ar | hi | ja | ko | zh | zh-TW

        #Get Comprehend client
        comprehend = boto3.client("comprehend")
        #Use detect entities function to get a list of entities
        entities = comprehend.detect_entities(Text = content, LanguageCode = lang)
        resp = NERResponse("", "true")
        #Loop throuh entities and filter them by PERSON, ORGANIZATION and LOCATION type
        #Put them in their onw list respectively
        #Only Grab those entities whose score is greater than 9.0
        for entity in entities["Entities"]:
            nt = NerTag(entity["Text"], entity["Score"])
            threshold = 0.9
            prob = float( entity["Score"])
            if (entity["Type"] == 'PERSON' and prob >= threshold):
                resp.add_people(nt)

            if (entity["Type"] == 'ORGANIZATION' and prob >= threshold):
                resp.add_organization(nt)

            if (entity["Type"] == 'LOCATION' and prob >= threshold):
                resp.add_location(nt)
        #Return the response. Make sure path statusCode and put the result in the body
        #Otherwise, it will throw 502 error when this api is being called.
        return {
            "statusCode": "200",
            "body": resp.toJSON()
        }
    except Exception as e:
        print(e.__class__, " occurred.")
        resp = NERResponse(str(e), "false")
        return {
            "statusCode": "500",
            "body": resp.toJSON()
        }
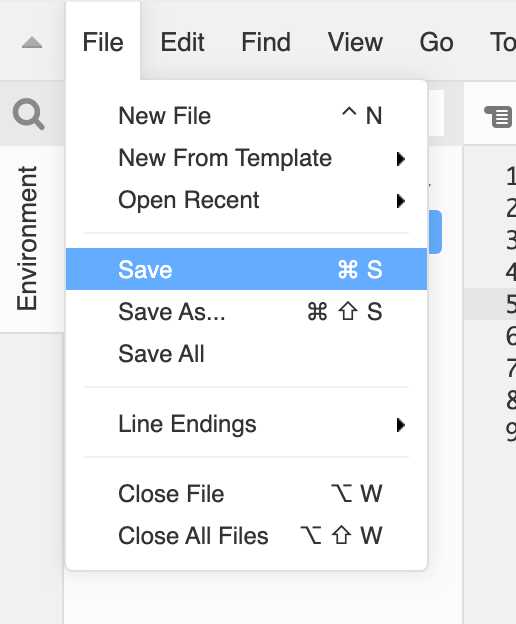
In this source code example, I grab those entities whose score is greater than 0.9. You can change this by updating threshold variable. There are also Date, Quantity ,Other and more. You can check all list of types here. You can save the source code by using the short key command+s or control+s depends on your OS or you can go to File and choose Save.
Once all source code looks ok, then click Deploy button.
Create an API endpoint that leverage your lambda function
Ok. It's time to set up an API endpoint. First, go to API Gateway. Again, you can type "API Gateway" in search bar and click the service.
In APIs page, click Create API button. There should be 4 options.
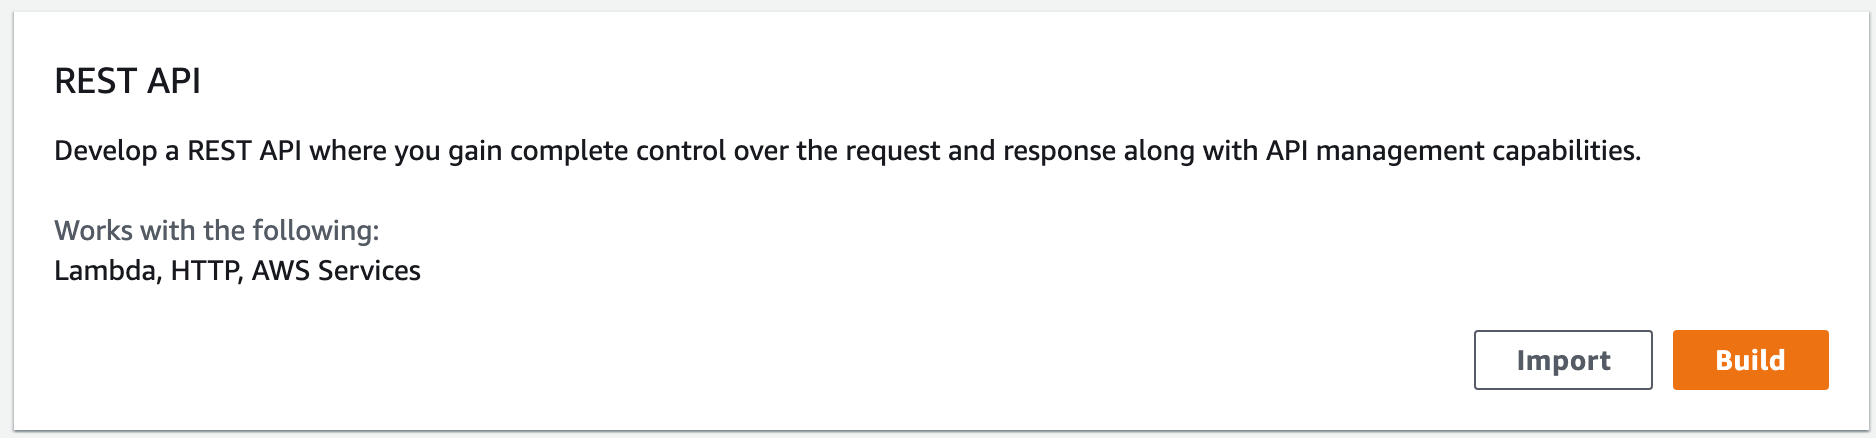
Click Build button in the REST API (This is not private one). The initial setting like the below screenshot will be appeared.
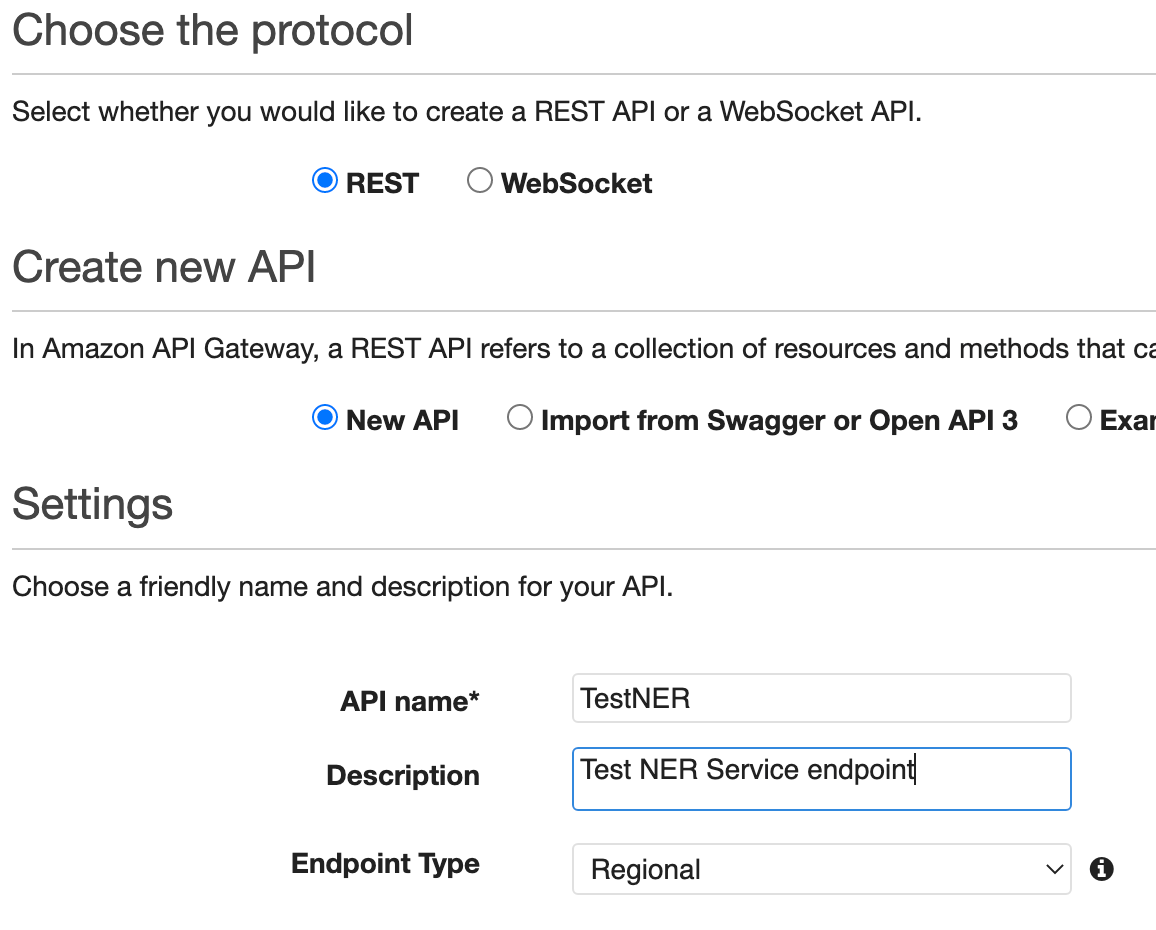
Provide the input as follows:
- Choose the protocol: REST
- Create new API: New API
- API name: TestNER
- Description: Test NER Service endpoint
- Endpoint Type: Regional
Click Create API button.
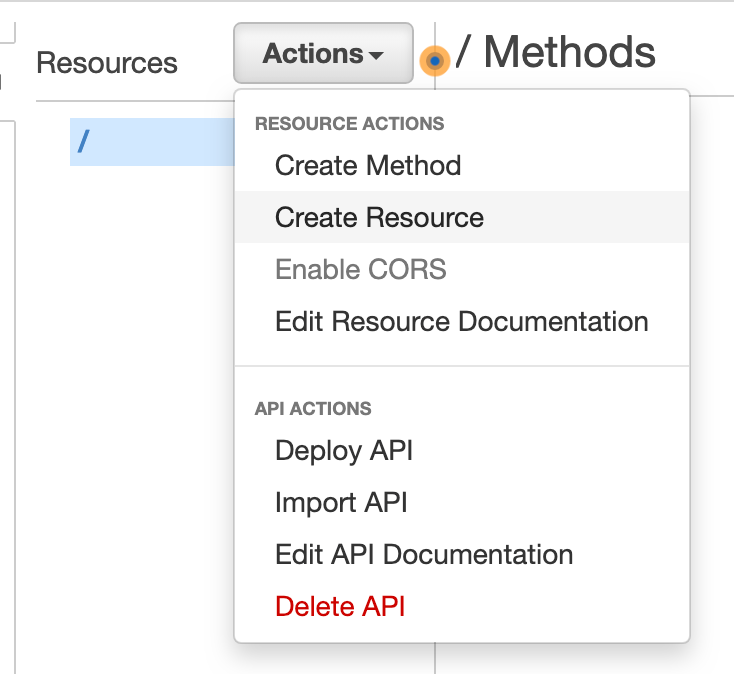
Once you can see the Resources page, there should be only one under Resources section which is /. In this post, I will construct the endpoint as follows.
/ner/{lang}where lang should be one of en | es | fr | de | it | pt | ar | hi | ja | ko | zh | zh-TW.
Click Actions -> Create Resource.
Type ner in the Resource Name. Resource Path will be automatically cloned.

You can leave proxy resource and Enable API Gateway CORS as unchecked. Click Create Resource button. This will create /ner path under /. Select /ner and create resource one more time (Actions -> Create Resource). However, in this time, enter {lang} first in the Resource Path and enter lang param as a resource name as shown below.

Now you should be able to see /{lang} under /ner. Click /{lang} and create method (Action -> Create Method). The dropdown will be appeared.
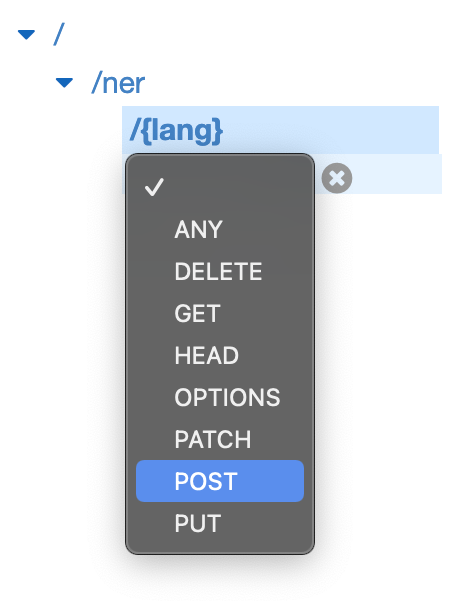
Select POST in the dropdown and click check icon. The page will be redirected to the new page where you can choose integration type.
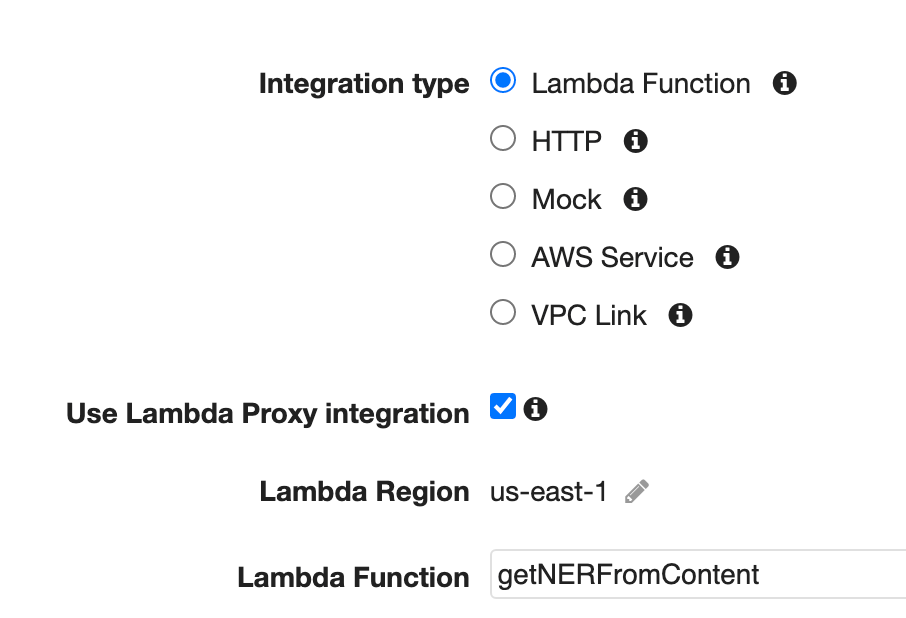
Select Lambda Function as Integration Type and make sure to check Use Lambda Proxy integration so that Lambda function is able to receive path parameters such as {lang} in our case.
For Lambda Function text box, once you start typing the lambda function name that you used, the full name should be visible as an option underneath the dropdown. You can simply select it. Once click Save button, then there should be popup window to ask adding a permission to lambda function.
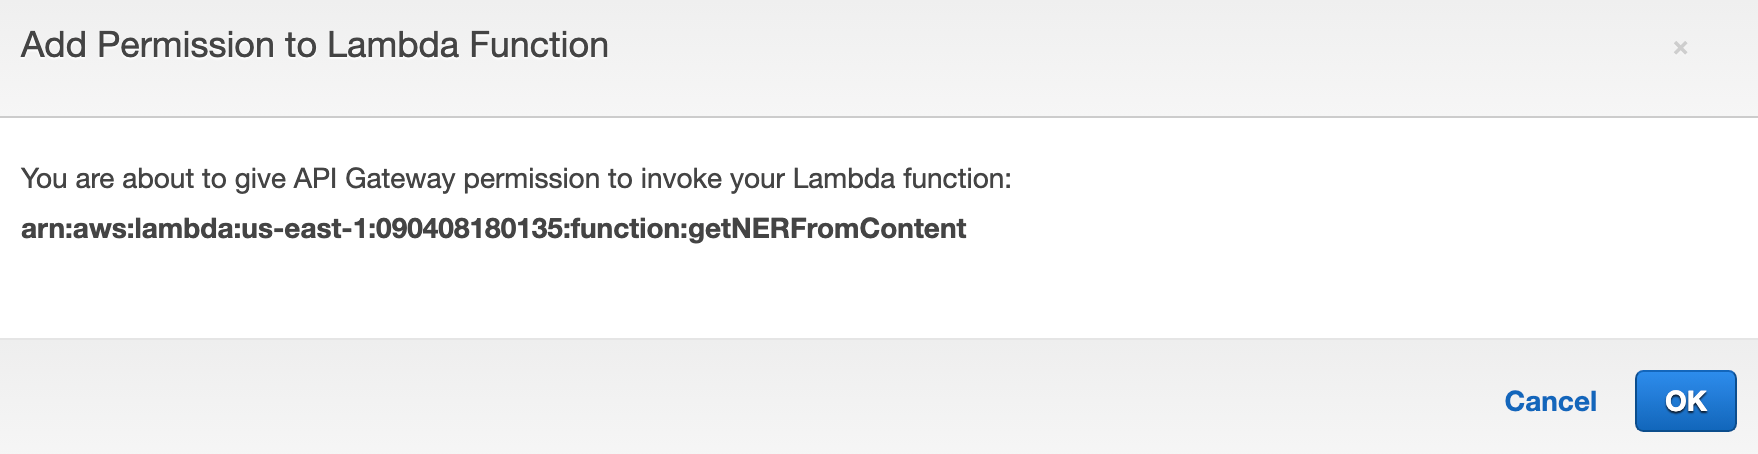
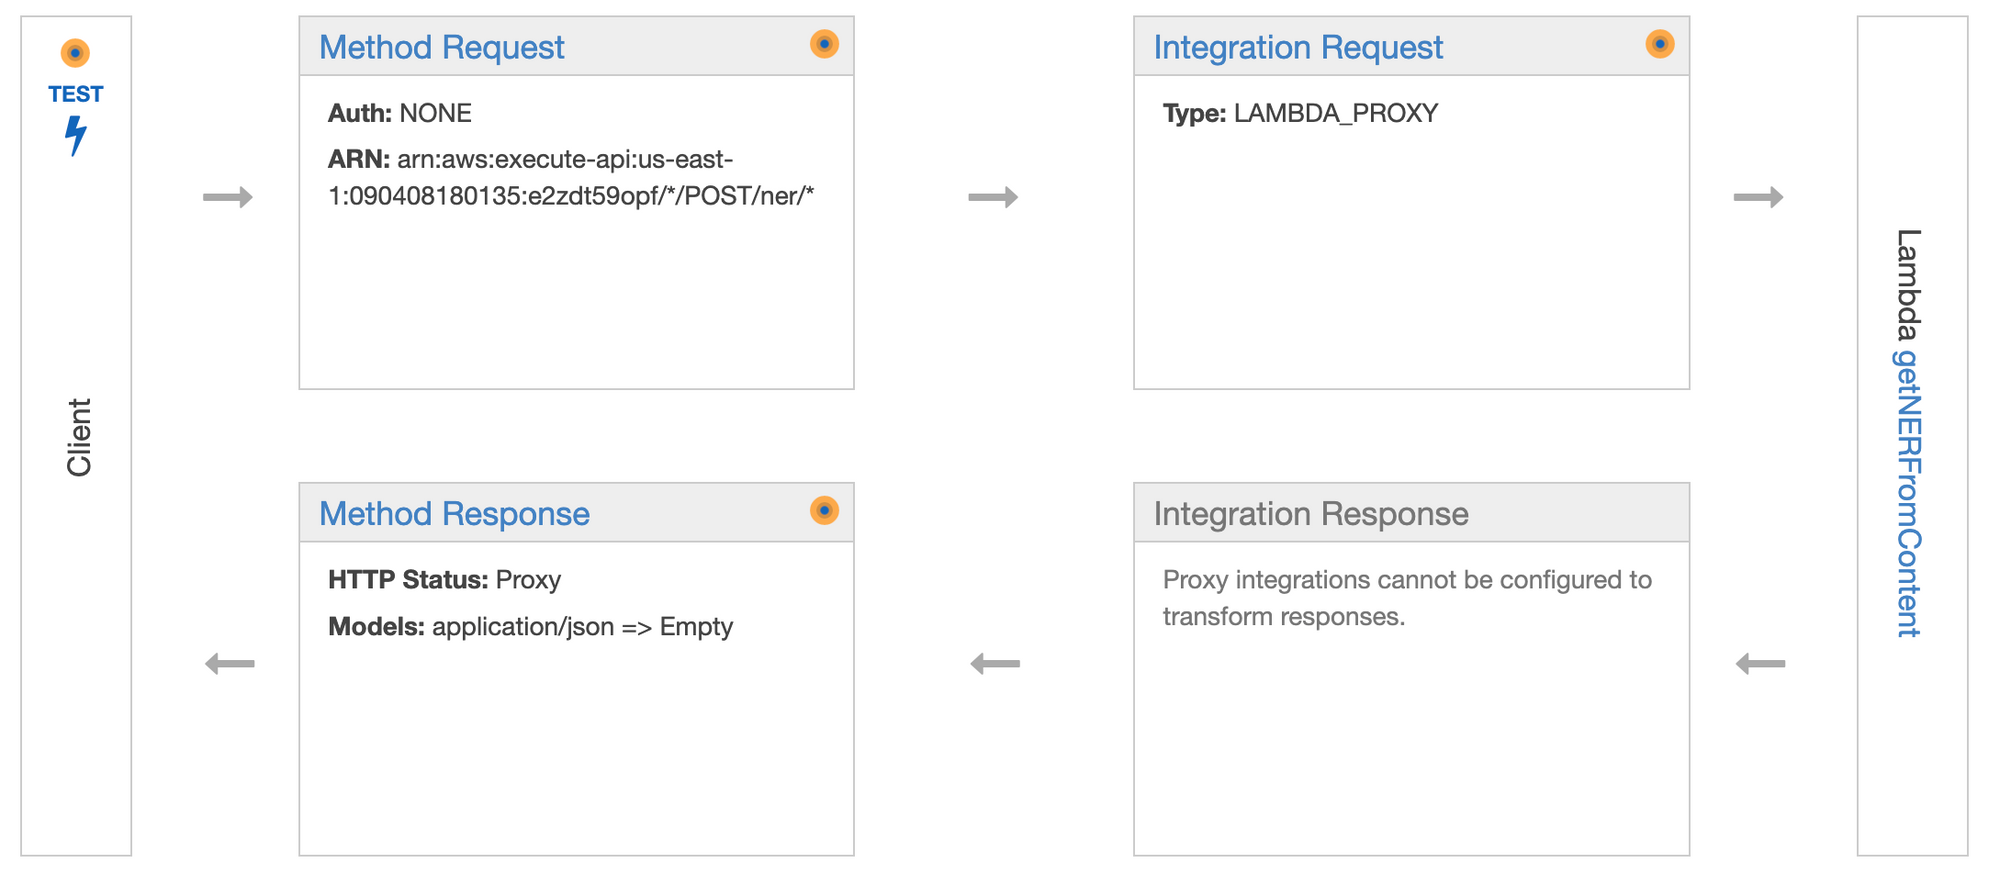
Click OK button. If there is no issue, then there should be a method execution diagram that is similar to the screenshot below.

Great. We successfully create the endpoint with the lambda function. Let's deploy this API. From Actions button, choose Deploy API. In the modal, select [New Stage] as Deployment stage.
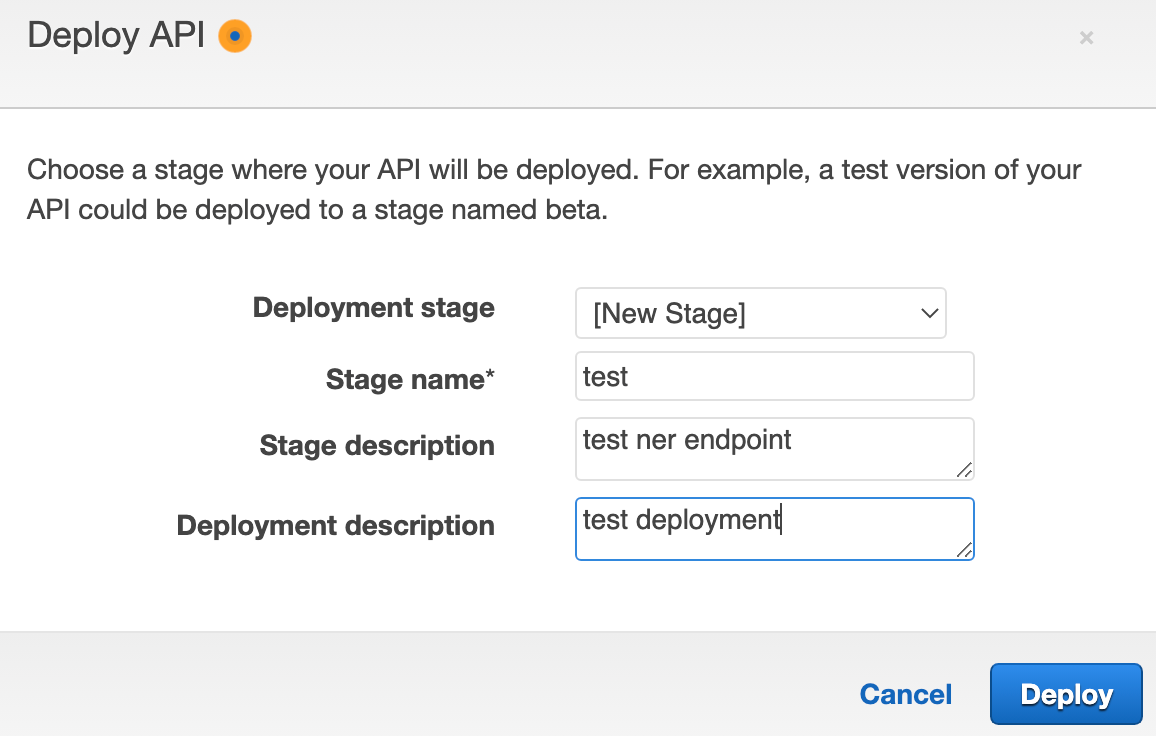
And provide Stage name, description and Deployment description. I used "test", "test ner endpoint" and "test deployment" respectively. Click Deploy button.
That's it. Your API Url will be displayed in Invoke URL.

Ok. Your NER service endpoint is now set as
https://YourInvokeURL.com/test/ner/{lang}
In my case, the NER endpoint should be
https://e2zdt59opf.execute-api.us-east-1.amazonaws.com/test/ner/en
Almost done. Fix the possible permission issue!
Ok. We're almost done. However, if you test this endpoint via your postman, you should run into the permission issue. This is because the user role that is being used for executing lambda does not have the permission for using Amazon Comprehend yet. In order to fix this issue, go to IAM (search IAM) and select Roles under Access management. Search the role by using your lambda function name which is getNERFromContent. You can find the similar role below.

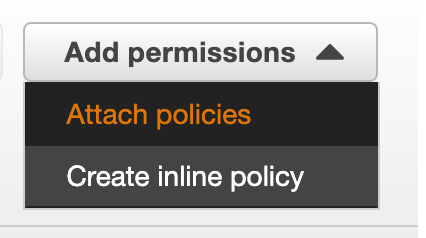
Click the link (getNERFromContent-role-xxxxxx) and click Add permissions -> Attach policies menu in the detail page.
In the new page, there should be a bunch of list of policies. To search comprehend related policies, let's type comprehend in the filter text field and hit enter key.

Select the checkbox for ComprehendFullAccess and click Attach policies button.
I chose ComprehendFullRequest as an example. Depends on a situation, creating custom policy might be inevitable, or a different role might be used instead. Consider discussing with your IT/DevOp team if needed.
Ok. All set. Let's test it.
Test your NER endpoint call vis postman
In your postman, enter your NER service endpoint with adding the following content (in Json) in the body.
{
    "content": "Steve Jobs was born in San Francisco, California. He was the co-founder, chairman, and CEO of Apple. With Steve Wonzniak, he founded Apple Inc. in 1976. He was also the chairman of Pixar."
}
You should be able to see the result like below.
{
    "error": "",
    "location": [
        {
            "prob": 0.9968991875648499,
            "text": "San Francisco, California"
        }
    ],
    "organization": [
        {
            "prob": 0.9990672469139099,
            "text": "Apple"
        },
        {
            "prob": 0.9954066276550293,
            "text": "Apple Inc."
        },
        {
            "prob": 0.9990543723106384,
            "text": "Pixar"
        }
    ],
    "people": [
        {
            "prob": 0.9995225071907043,
            "text": "Steve Jobs"
        },
        {
            "prob": 0.9993040561676025,
            "text": "Steve Wonzniak"
        }
    ],
    "success": "true"
}
If the endpoint does not work for some reason, check the indentation in the source code of the lambda function and double check the permission. You can also check the logs for lambda function from the CloudWatch as well.
For your information, this test endpoint will not be available for the security reason.
Hopefully this post will be helpful to you and thanks for your time to read this post. Happy coding!