Start with your own blogging site with Ghost CMS & AWS - part 2


Previously, I covered how you can create the new ec2-instance by leveraging AWS free-tier option. In this post, we will focus on the following steps.
- SSH into ec2-instance from your local
- Install nginx, node and mysql
- Install & configure Ghost CMS
- Set up the Domain for the site
- Secure your site & Update nginx configurations
Before you ssh into our newly created instance, there should be a pem file in your Downloads folder that was downloaded before AWS launched the new instance.
Let's assume the key pair name was test-key-pair-example and open your terminal. (I'm using iTerm)
# Go to Downloads folder
cd ~/Downloads

# Move the pem file to .ssh folder
mv test-key-pair-example.pem ~/.ssh

# Change the permission of the pem file
chmod 400 ~/.ssh/test-key-pair-example.pem
- SSH into EC2-instance from your local
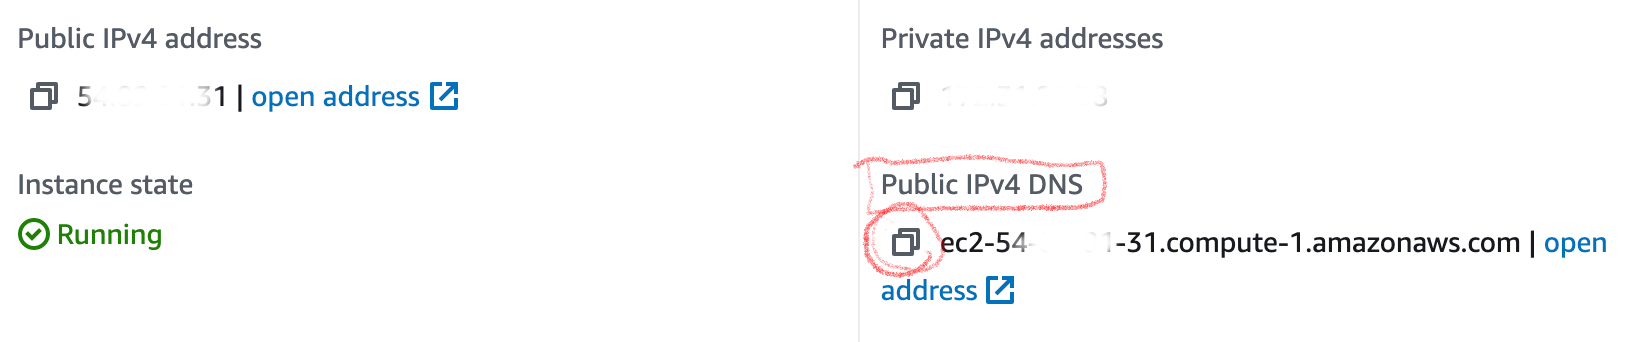
Now, go to your AWS console -> EC2 -> Instances and select the ec2-instance you created. It will show the detail information of your instance. Copy the value under Public IPv4 DNS by clicking the icon in the red circle below.
(You can also click "Connect" button and go to "SSH client" tab to get this public DNS information.)
Once you finish copying your public DNS value, go back to your terminal and run the following command.
# Let's ssh into the ec2-instance!
ssh -i ~/.ssh/test-key-pair-example.pem ubuntu@YourPublicDNS.com

#Example
ssh -i ~/.ssh/test-key-pair-example.pem ubuntu@ec2-22-11-43-31.compute-1.amazonaws.com
If you see "Are you sure you want to continue connecting (yes/no...)" message, type "yes". Now you should be able to ssh into the instance successfully.
2. Install NGINX, NODE and MYSQL
You can keep using ubuntu as a user, but don't forget to use sudo in front of following command.
Let's start with upgrading packages. Type "y" if system asks a permission to proceed after you execute each command.
# Update packages
sudo apt-get update

# Update installed packages
sudo apt-get upgrade
It's time to install Nginx. Nginx is a server to serve your ghost CMS via port 80 (HTTP) and 442 (HTTPS).
# Install Nginx
sudo apt-get install nginx

# Make firewall allow HTTP and HTTPS connection
sudo ufw allow 'Nginx Full'
For node installation, ghost supports the following versions.
- 12.x
- 14.x
- 16.x
Since 14.x is the recommended version, we will use version 14 as our node version.
# Add NodeSource APT repository for Node 14
curl -sL https://deb.nodesource.com/setup_14.x | sudo -E bash

# Install Node
sudo apt-get install -y nodejs
Ghost CMS needs the database to store the data. Let's install MySQL server.
# Install MySQL
sudo apt-get install mysql-server
After installing MySQL server, you need to set a password of root db user.
# Access MySQL
sudo mysql

# Update the password of
ALTER USER 'root'@'localhost' IDENTIFIED WITH mysql_native_password BY 'yourpasswordhere';

# Exit MySQL
quit
*Note: This root password will be used during ghost installation.
3. Install & configure Ghost CMS
In order to create the new Ghost CMS, Ghost-CLI (commandline tool) is mandatory.
# Install Ghost-CLI
sudo npm install ghost-cli@latest -g

# Create a directory where the source code of Ghost CMS will be located at. I put "ghostblog" as my site name, but you can put any name instead of "ghostblog" here.

sudo mkdir -p /var/www/ghostblog

# Set ubuntu as user and group permission on this direcotry
sudo chown ubuntu:ubuntu /var/www/ghostblog

# Set correct directory permission
sudo chmod 775 /var/www/ghostblog

# Go to the directory
cd /var/www/ghostblog
Ok. Now it's finally time to install GhostCMS. Run the following command.
ghost installThis might take some time and start asking several questions. Before answering them, let's set up our domain.
4. Set up the Domain for the site
As I mentioned in part1, I'll use "Godaddy" as a domain service provider where I purchase a domain. However, you should be able to follow the similar steps described below to your domain service provider.
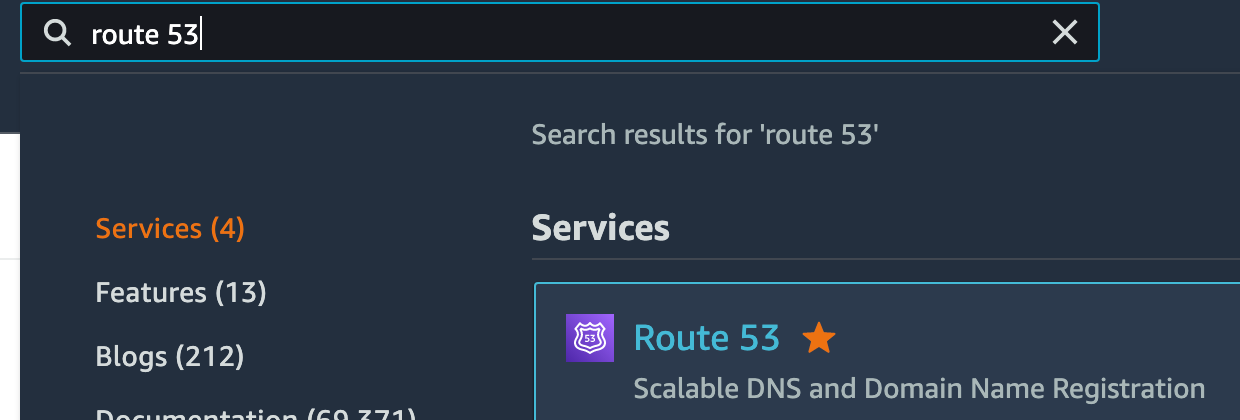
First, from your AWS console, search "route 53" and click the link from the search result.
Go to "Hosted zones" from left menu and click "Create hosted zone" button.
Double check your domain name and enter the name in Domain name text field. You can leave the Type as "Public hosted zone"
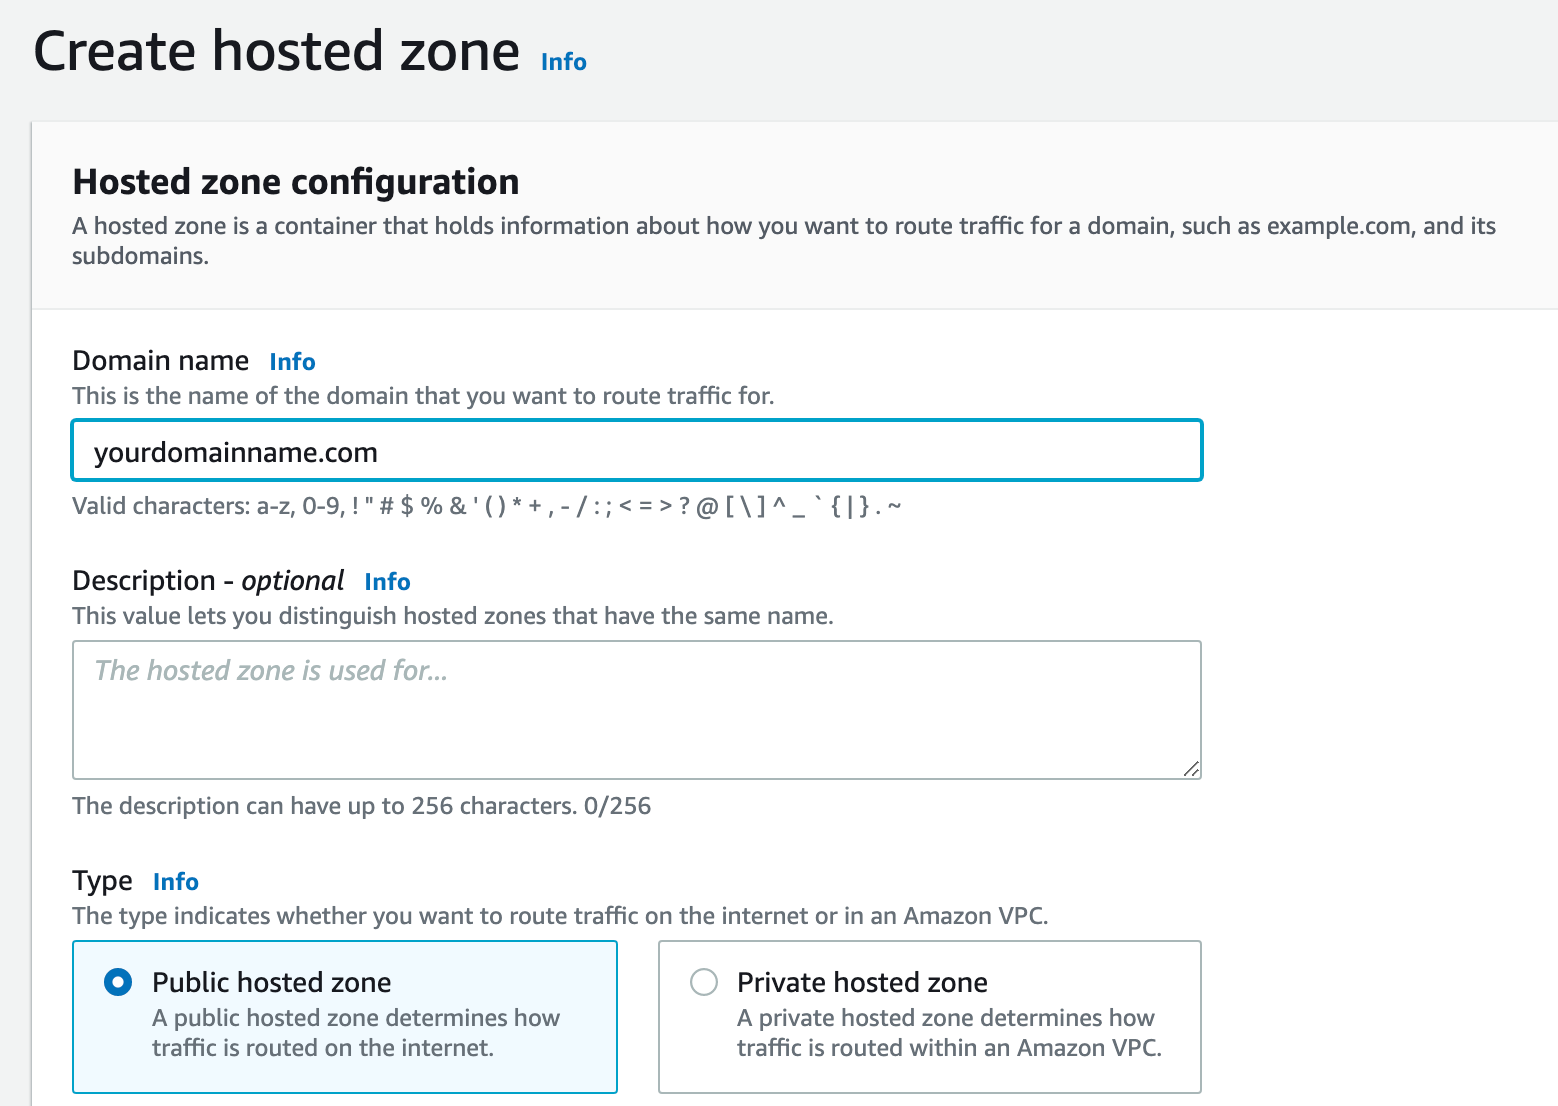
Click "Create hosted zone" button. Once your domain hosted zone is created, you can see the NS record in the list.
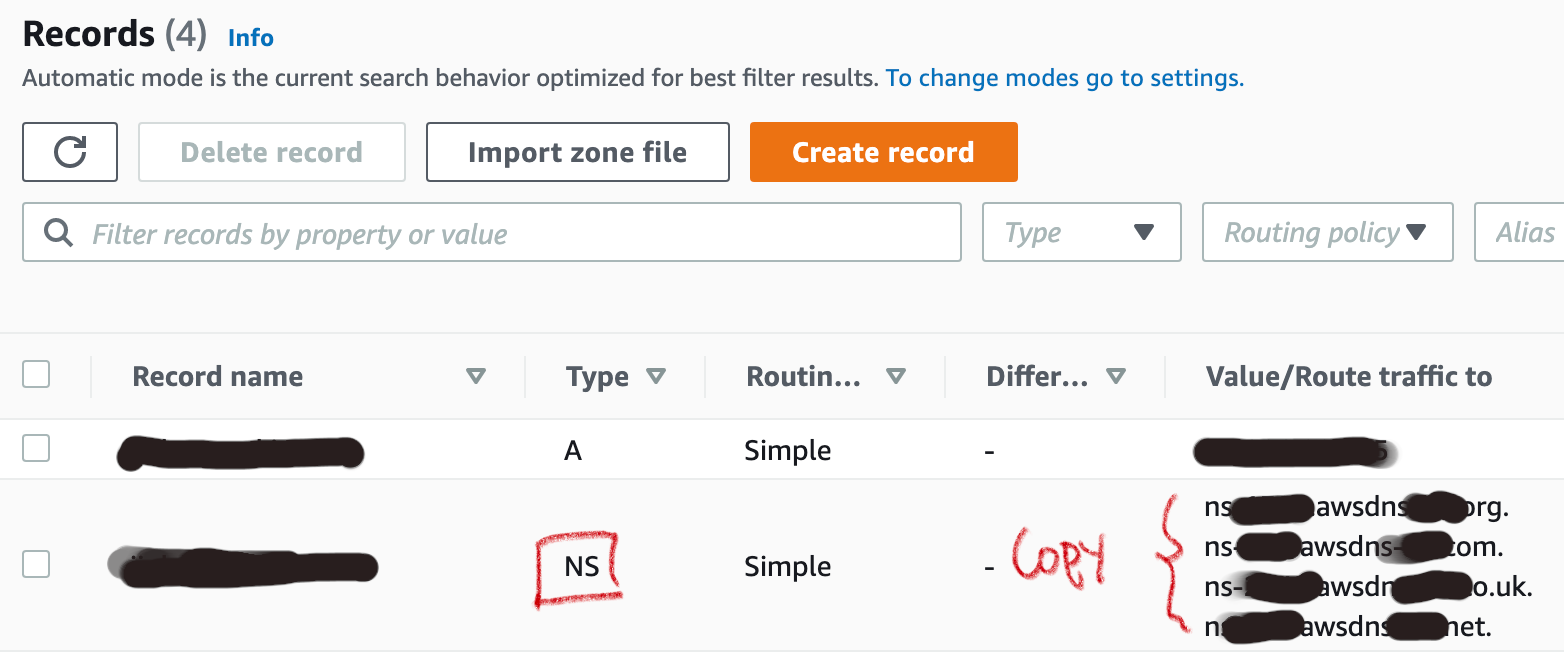
There should be 4 values for your NS record. We need to access the domain service provider and replace NS record values.
From Godaddy, follow the steps below.
- Log in
- Click your user name on top right corner
- Go to "My Products"
- Find the domain name under "All Product and Services" section.
- Click DNS button.
- In Nameservers section, click "Change" button.
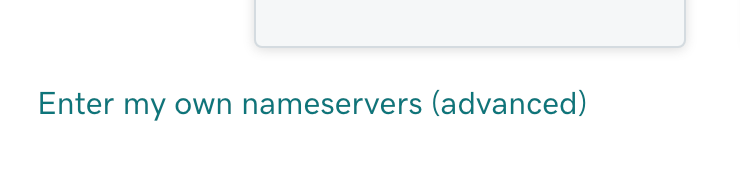
- Select "Enter my own nameservers (advanced)" link.
- Please make sure each NS record value does not end with a dot (When you copy the value, do not include the dot at the end)
- Copy all 4 NS values in each name server from Route 53 to text fields in Godaddy's "Edit Nameservers" popup modal. (You might need to use "Add Nameserver" to have more text fields)
- Click "Save" button.
Ok. Now we need to create a couple of A records in the route 53. Before we go back to route 53, we need to grab a public IP address of the ec2-instance.
However, there is one additional step to do before we just copy the public IP address. Since we're using the free-tier instance, this public IP address will be changed every time this ec2-instance stops or restarts. To prevent this IP address from changing, you need to use the static IP address and associate to the ec2-instance.
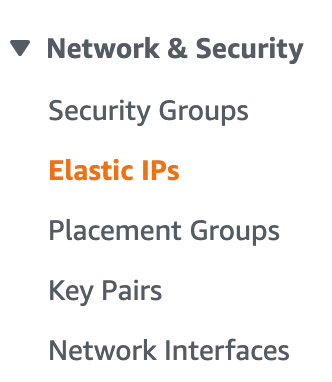
In order to create this static IP address, go to EC2 -> Elastic IPs under Network & Security from left menu.
In Elastic IPs page, click Allocate Elastic IP address button located at the top right corner of the screen.
Leave the default options and click Allocate button. There should be new IP record available on your Elastic IP address list.
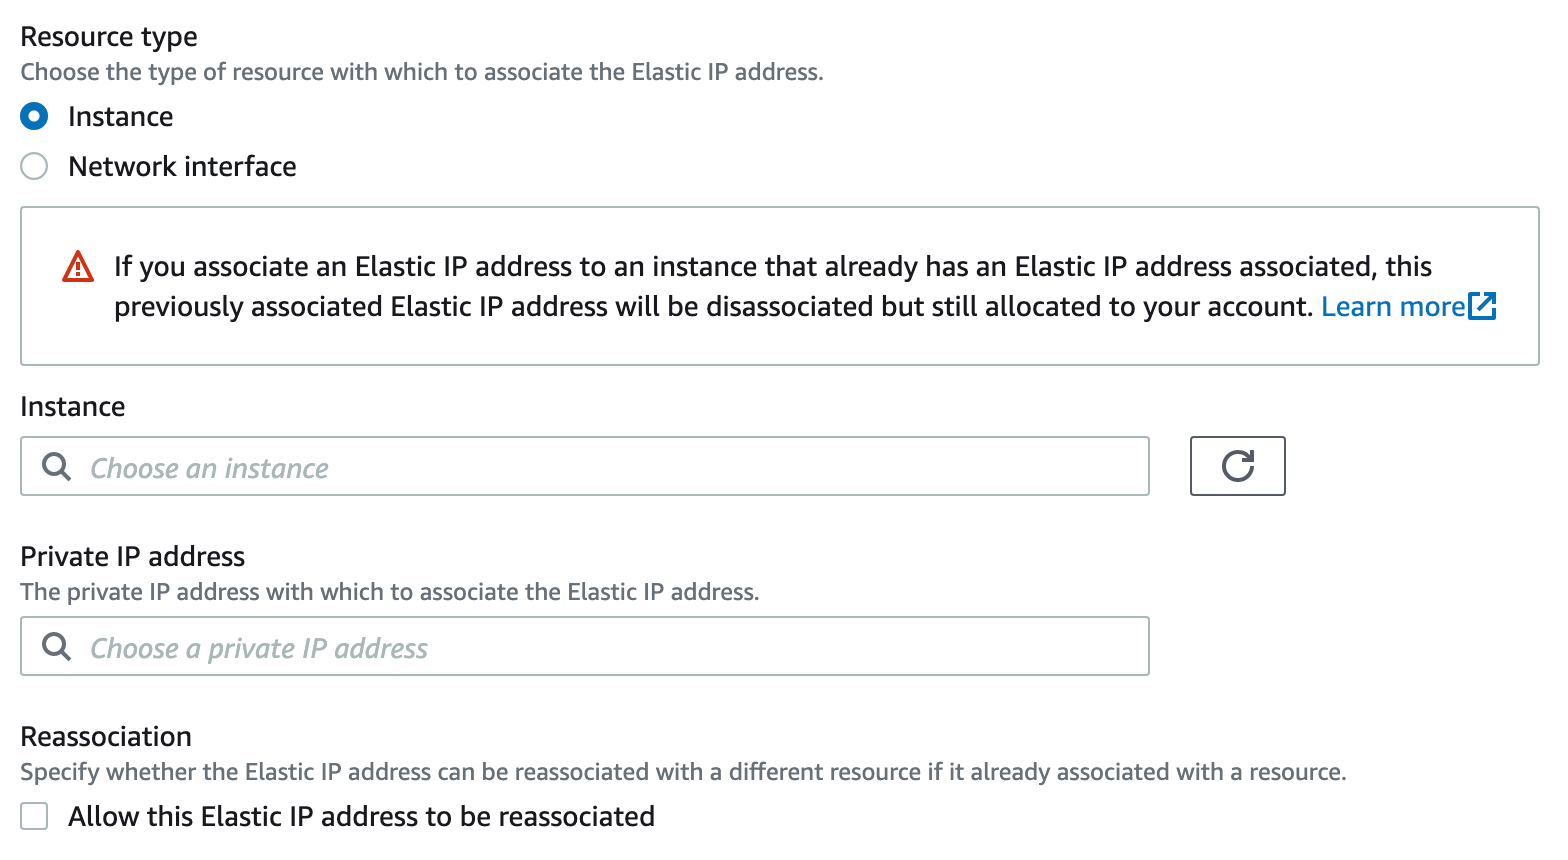
Click the checkbox of the record -> Actions -> Associate Elastic IP address.

In "Associate Elastic IP address" page, choose your ec2-instance in instance textbox. Once you choose it and click Private IP address textbox, then private IP address of the selected ec2-instance will be automatically shown up. Make sure you choose the IP address.

Tick the Reassociation checkbox if you want your Elastic IP address to be able to reassociated with other resource.
Click Associate button.
That's it. Now your ec2-instance has static public IP address!
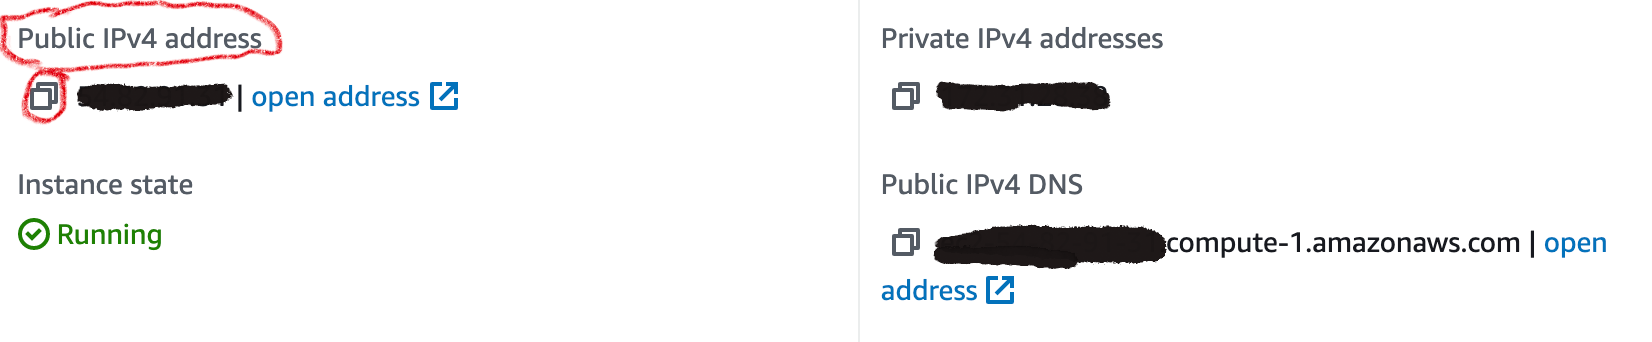
Go to EC2 -> Instances. You can notice your public IP address has been changed to the elastic IP address you had above. Copy Public IP address under "Public IPv4 address"
Go back to Route 53 -> hosted zones -> Click your domain name.
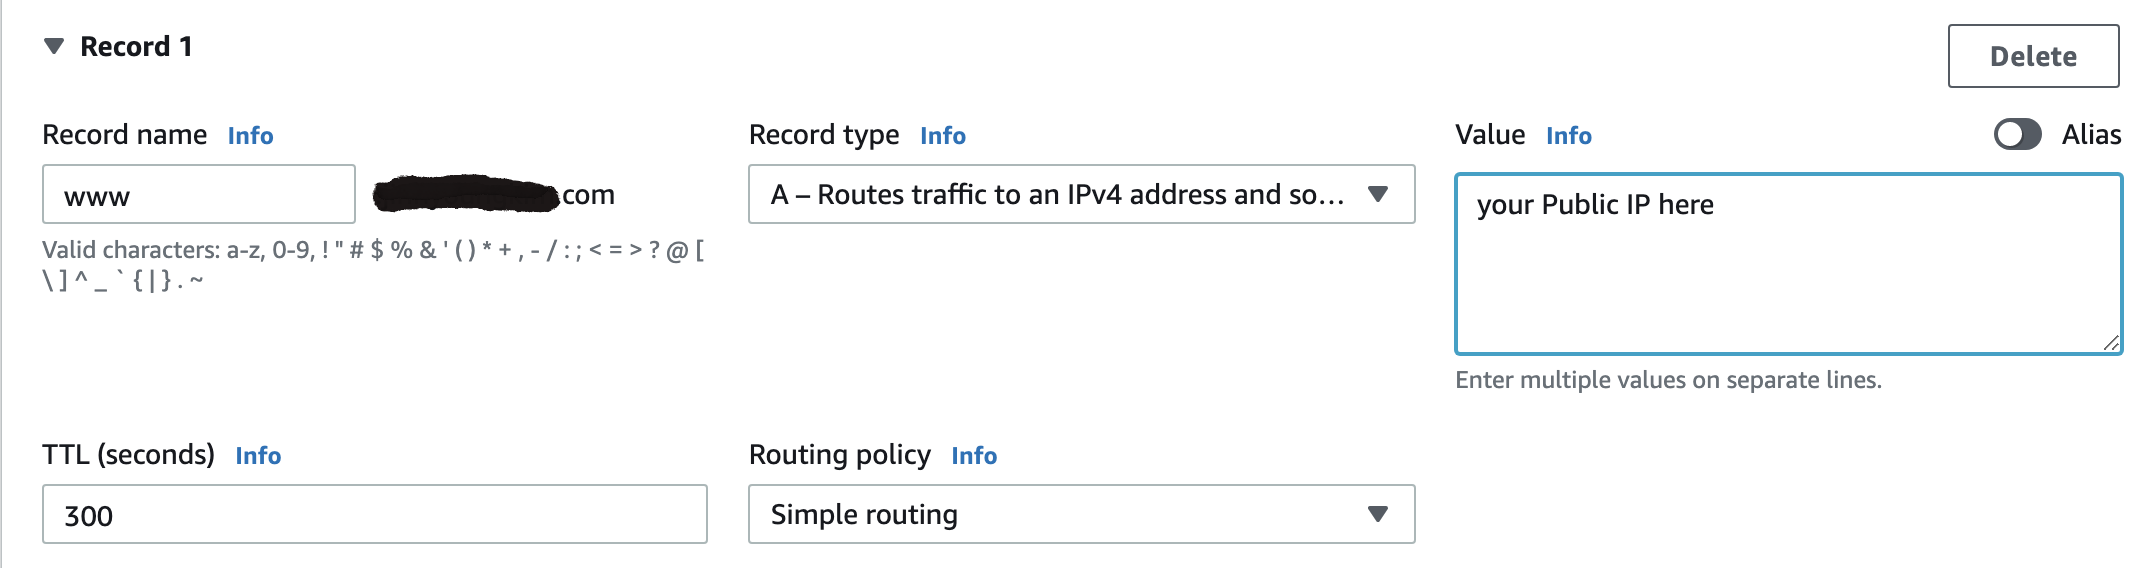
Click "Create Record" button (Make sure you create two records) and following values.
For first record,
- Record name: leave as it is (empty)
- Record type: A - Routes traffic...
- Value: Public IP address you just copied from your ec2 instance detail page
For second record,
- Record name: www
- Record type: A - Routes traffic...
- Value: Public IP address
Now your domain is all set for your ec2-instance.
5. Ghost Installation (Continue...)
Once you go back to your terminal where you executed ghost install command, the installation is on hold and asking the following questions.
- Enter your blog URL: http://yourghostdomain.com
- Enter your MySQL hostname: localhost
- Enter your MySQL username: root
- Enter your MySQL password: Your root user password (Please refer to mysql server installation in Section 2)
- Enter your Ghost database name: Any name should be fine. The default name is your site folder name + "_prod". So in our case, "ghostblog_prod" is the default name.
- Do you wish to set up "ghost" mysql user? : Y
- Do you wish to set up Nginx?: Y
- Do you wish to set up SSL? Y
- Enter your email (For SSL Certificate): Your email address
- Do you wish to set up Systemd?: Y
- Do you want to start Ghost? Y
Once you input all answers, the following message will be displayed.
Ghost was installed successfully! To complete setup of your publication, visit:

http://yourghostdomain.com/ghost/
Copy the url and paste it in your browser.

Click "Create your account" button. Enter the following information and click "Last step: Invite staff users >" button.
- Site title
- Full name
- Email address
- Password
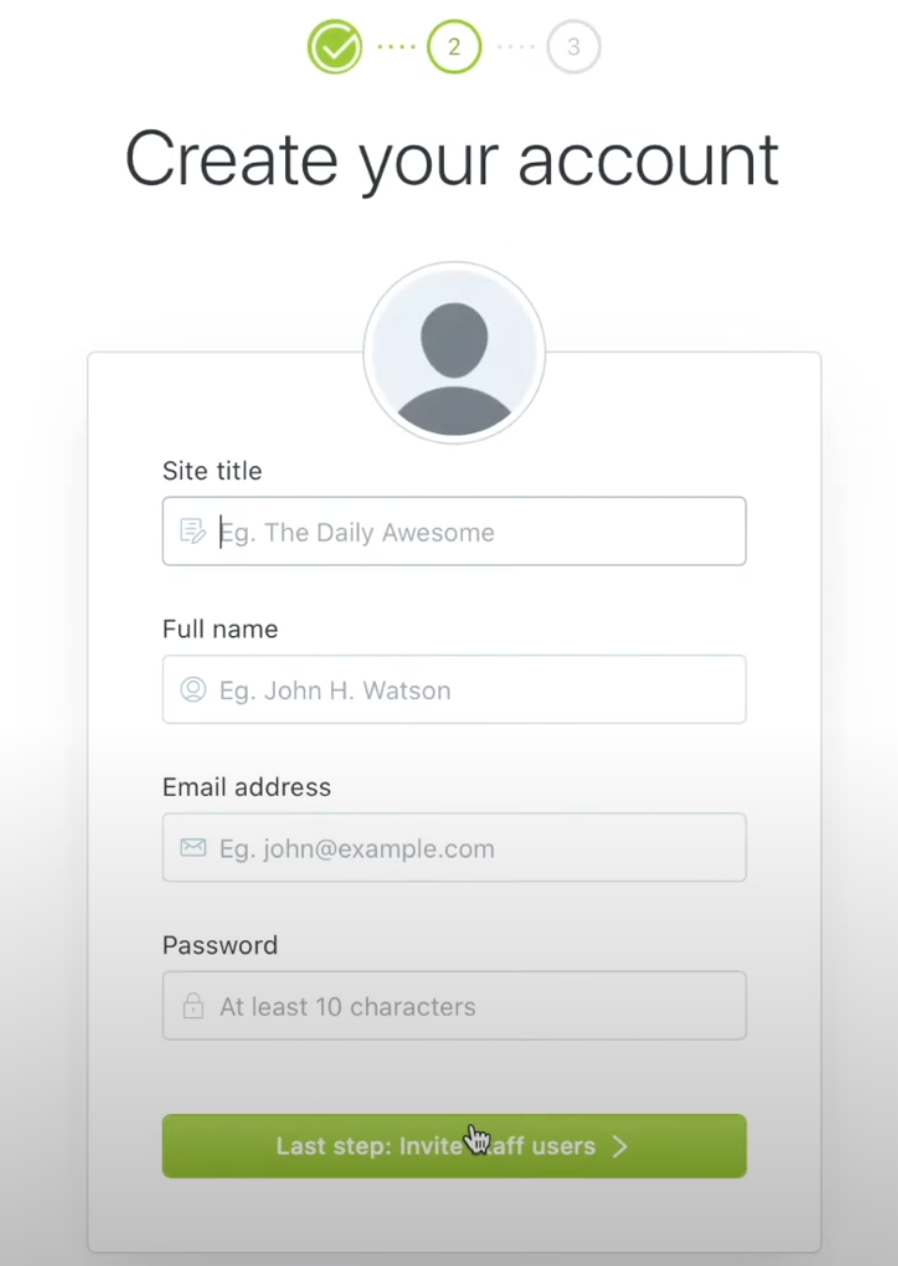
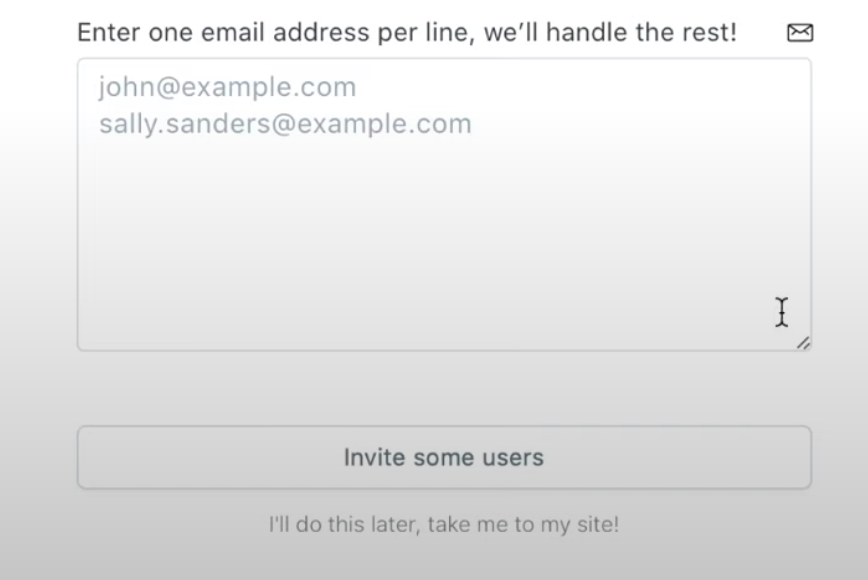
You can invite person who can help manage your site by providing an email address. Otherwise, click "I'll do this later..." link.
Well done. Your ghost site should be up and running properly. There is only one more step to go: Securing your website.
6. Secure your site & Update nginx configurations
Go back to your terminal and make sure you're on the site root directory.
# Check your current path
pwd

# If you are not on the site root directory
cd /var/www/ghostblog

# add www domain with https
ghost config url https://www.yourghostdomain.com

# Create additional Nginx config files for www
ghost setup nginx ssl
After the last command is run, system will ask your email address again. Enter your email address and restart the ghost
# Restart Ghost CMS
ghost restart
Next, we will update our nginx configuration files to make 301 redirection to cover the following cases:
- http://yourghostdomain.com -> https://www.yourghostdomain.com
- http://www.yourghostdomain.com -> https://www.yourghostdomain.com
- https://yourghostdomain.com -> https://www.yourghostdomain.com
# Go to Nginx conf folder
cd /etc/nginx/sites-enabled
There should be 5 conf files.
- default
- yourghostdomain.com.conf
- yourghostdomain.com-ssl.conf
- www.yourghostdomain.com.conf
- www.yourghostdomain.com-ssl.conf
However, we're going to add 301 redirection rule to the following conf files only:
# Copy this 301 redirection command

return 301 https://www.yourghostdomain.com$request_uri;- yourghostdomain.com.conf
- yourghostdomain.com-ssl.conf
- www.yourghostdomain.com.conf
# Copy the following
# Edit yourghostdomain.com.conf

sudo vi yourghostdomain.com.conf

# Move the cursor to right next "proxy_pass"
# type i <- This will change vi editor to be insert mode
paste your 301 redirection rule here

# Hit ESC
:wq
Repeat this process to yourghostdomain.com-ssl.conf and www.yourghostdomain.com.conf as well.
*Note: DO NOT ADD this to www.yourghostdomain.com-ssl.conf file.
For your information, the part of your nginx configuration looks similar to this.
location / {
        proxy_set_header X-Forwarded-For $proxy_add_x_forwarded_for;
        proxy_set_header X-Forwarded-Proto $scheme;
        proxy_set_header X-Real-IP $remote_addr;
        proxy_set_header Host $http_host;
        proxy_pass http://127.0.0.1:2368;

        return 301 https://www.yourghostdomain.com$request_uri;
    }
Last but not least restart the nginx!
sudo systemctl nginx restart
Well done! Your Ghost blogging site should be up and running with HTTPS. Happy Blogging!